Swapping bike forks can be done and will improve the handling of your bike significantly.
Many cyclists consider swapping forks at some stage in their cycling journey but are unsure whether it is possible. It’s totally doable given you have the right tools and knowledge.
There are various forks available, so you should have a clear idea of your requirements, as this will save you valuable time and money.
Can You Swap Forks on a Bike?
Yes, It is relatively easy to swap Bike forks even at home, but you will need to make sure you have the proper tooling on hand. Before you go ahead, you should consider the type of bike you have and fork size to ensure compatibility.
How Do You Know if a Fork Will Fit Your Bike?
Before you get started, deciding which forks will fit your bike can be a complicated step.
The first thing you will need to consider is the fork type and travel.
The travel range defines the type of fork you will need to fit your bike. It is advisable to stick with a fork and travel within 20mm of your current bike fork.
Essential Measurements & Assessment Before Making the Move
Finding the right forks to fit your bike can be complicated. Your bike fork must match your bike specifications, or it will affect your bike’s performance. I have listed the essential items you will need to know below:
1- Wheel Size
Determine the wheel size of your bike tire, located on the side of your bike tire. Your wheel hub must fit the fork, or you will find that you cannot attach the front wheel to your bike.
2- Braking System
The type of braking system in place will determine the type of mounts your fork requires. The most common braking systems are disc brake, v-brake, or caliper braking systems.
If your bike has a disc brake system, your fork will need disc brake mounts.
3- Length of Steering Tube
This is a factor in determining the correct fork size. There are different measurements for unthreaded and threaded steerer tubes.
The length of the steerer tube must accommodate the headset. Your fork size is dependent on the headset you use, so make sure your fork is compatible with the headset before you purchase a replacement fork.
4- Diameter of Steering Tube
This measurement is vital if you want to replace your bike fork. The steerer tube is the top portion of the fork that attaches the fork to the frame and handlebars and allows the cyclist to steer. If your fork does not match the diameter of the steering tube, it will not fit.
There are three standard sizes:
• The 1-inch typical diameter steer, although an older model, will pair with most forks, including threaded headsets.
• The 1-1/2 inch diameter steer is compatible with most modern-day bikes and pairs with a threadless steerer tube.
• A tapered tube has no standard diameter, so you may need to consult your local mechanic to find a compatible fork.
The key takeaway for steerer tubes is that you cannot put a fork on a bike that has a diameter larger than the diameter of the head tube on your frame unless you have an adapter. If you find your fork does not fit, there are various adaptors on the market that you can use.
Once you have identified your bike specifications, finding a bike fork compatible with your bike is easy. Keep in mind that there are slight variations in fork size depending on make and model. As with any replacement part, if you are unsure, I advise contacting your local bike shop.
Do All Suspension Forks Fit All Bikes?
The short answer is no. Not all suspension forks will fit your bike, so you must choose a suspension fork compatible with your bike’s frame and front wheel.
Swapping suspension forks is a great performance enhancer for your bike and will increase your bike’s ability to deal with rugged terrain and will provide more grip.
Not all bike forks are made equal, so you must select a fork that is best for you and your bike.
When it comes to suspension forks, consider the following additional factors to ensure your fork fits your bike:
Bike Travel
The amount that a suspension fork or suspension frame can compress is known as travel on a bike. The travel on a bike will dictate the type of fork which you require.
The frame of your bike is designed to withstand a certain amount of travel. Therefore, most experts advise that you stick with a fork and travel within 20mm of your current bike fork not to affect the bike’s handling.
Before selecting a new fork, check that your warranty allows for an adjustment to travel.
Spring Type
There are two types of fork springs – Air springs and Coil springs, each with its positives and negatives. Most bikes use air-sprung forks these days. Make sure you identify the type of fork you currently have to match up your replacement fork.
Compression Damping & Rebound Damping
It is vitally important that you assess your bike’s compression damping and rebound damping before replacing the suspension forks, or you will find that they don’t fit your bike.
COMPRESSION DAMPING
How the fork moves through its travel is determined by compression damping. All modern-day forks are equipped with a compression adjustment and will have a lockout in place to stop the fork from compressing during your ride.
REBOUND DAMPING
Rebound damping refers to how fast your fork returns to its original point. Most bike shocks come with this adjustment in place.
The type of shock you have on your bike will impact the way your fork reacts to the terrain.
Can You Put 140mm Forks on a 100mm Bike?
It is advisable not to put a 140mm fork on a 100mm bike.
1- As with many things in life, anything is possible, but, in this case, you may find that your bike does not ride as well, and your frame may break if you swap your 100mm bike forks for 140mm forks.
2- If you are planning to replace a 140mm fork with a 100mm fork, you are likely looking for more travel. Bear in mind that although you may increase your travel, the handling on your bike may be negatively impacted.
It is important to note that you will change your head angle, and your steering may be slightly slower.
Can You Put a 130mm Fork on a 120mm Bike?
Yes, you can put a 130mm fork on a 120mm bike, and your handling should not be severely impacted. A change of 10mm is usually not significant enough to make a noticeable change.
If you do notice any difference in handling, it will probably be slight. If you have already purchased the 130mm bike fork, I recommend that you swap the bike fork for a great cycling experience.
Can You Put 150mm Forks on a 120mm Bike?
Putting a 150mm fork on a 120mm bike could place unnecessary strain on your bike frame. This will impact the geometry and handling of your bike.
Most experts recommend a change of no more than 20mm. Anything more may result in damage and injury when riding your bike.
To ensure maximum safety, I advise that you only increase your bike fork by 10mm. If you are a cyclist who seeks the thrill of adrenalin coursing through your veins, it is possible to give it a bash, but the outcome may not be pretty.
Can You Put a 120mm Fork on a 100mm Bike?
It is possible to put a 120mm fork on a 100mm bike, but it may impact your bike frame. The bike’s handling will change, which may impact climbing and cornering on your bike, and your bike may generally feel less stable.
It is important to remember that if your bike is still under warranty, it is not worth it and may void the warranty.
How Do You Swap Forks?
Now we’ll learn about the process of actually swapping the forks of your bike.
YOU’LL NEED
There are plenty of specialist tools available from local bike shops, and I recommend
1- A crown race puller, which can help you swap forks. This tool may not always be available to you, so I advise using a simple toolset that includes a set of Allen keys to remove the current forks from your bike.
2- You will also need a hacksaw or pipe cutter to cut the steerer tube down
3- A file
4- A tape measure to make sure you cut the correct length of your steerer tube
STEPS
STEP 1: Your first step is to remove the existing forks from your bike. The best way to do this is to place your bike into a work stand to secure it.
Alternatively, you can ask a friend to assist you by holding the bike’s front end up. Remove the front wheel of your bike and place it to one side.
STEP 2: The next step is to remove the brake caliper and loosen the cable routing of the existing fork and allow it to dangle down.
STEP 3: Once you have done this, release the cable guide on the fork itself until it comes away from the fork. It would be best if you didn’t lose any bolts, so make sure to place them back onto the fork.
STEP 4: Moving on to the stem of your bike, loosen the stem clamp bolts. Do not remove the top cap as the fork could potentially slide out, and you will lose your headset components. I suggest that you use an Allen key of between 4mm and 6mm.
STEP 5: Slowly undo the top cap and hold the fork at the same time. It is vital to note the distance between the steerer tube and the bottom of the stem.
STEP 6: Slide the stem off the steerer tube and remove the spacers which are situated under the stem. Once you have done this, slide the top plate and compression ring, and top bearing base off the stem and put these in a safe place.
STEP 7: Once you have gotten this far, you will be able to slide the forks out. I suggest that once you have done this, give the forks and frame a thorough clean. A good inspection is necessary to identify any potential faults or areas which are damaged.
You are now in a position to swap forks on your bike.
STEP 8: Hold the new fork and the old fork together and compare the length of the steerer tubes. Your goal is to notice any difference in length, as this will need to be trimmed to the correct length.
You will also need to remove the crown race from the fork. A crown race puller is beneficial but not a necessity.
Take your tape measure and measure your forks. Before you cut, check your measurements, or you may find you will need to replace the fork. Make sure you allow for a few millimeters of play when cutting to enable you to tighten your top cap.
Cutting your steerer tube should be done with a hacksaw, followed by filing off any abrasive edges.
STEP 9: Make sure you clean your fork entirely before assembling your fork.
You are now ready to reassemble your forks. I recommend you follow a systematic process so that no components are left out.
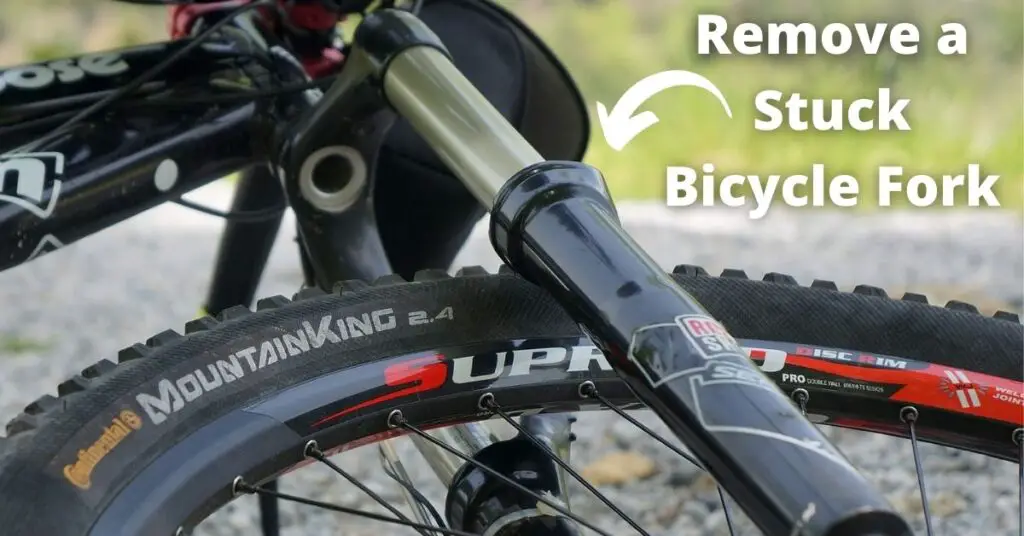
Facing Problems With Removing Threadless Forks?
You may find that removing a threadless fork is not an easy task. Removing a threadless fork should not be complicated, and you can follow the standard process to swap forks. Many cyclists find it reasonably easy to remove the headset cap and stem only to find that the fork remains in place.
The compression cone in the upper bearing is probably the issue because it is wedged in too tight. I suggest that you try to remove the split ring first using a screwdriver gently. You will find that, in most cases, it has a wedge-shaped cross-section that acts as a wedge.
Alternatively, a good tap is all that is needed to get it moving. A rubber or leather mallet is a good option.
Final Thoughts!
Paying attention to the critical components of your bike and what your fork is used for are key takeaways when swapping forks on your bike.
You will save yourself plenty of time if you have done a proper assessment and considered each of your bike’s measurements before swapping forks.
If you are unsure at any stage of the process, I advise you to approach your local bike shop. They will be able to provide you with specialist advice before you make a costly mistake and compromise your safety and an enjoyable bike experience!
Cheers!