If you are new to cycling, you may have heard of Decals. But what are Decals, and how are they different from stickers?
Stickers are all one solid print allowing you to peel and simply stick onto an object. Decals have transfer tape over the design so that more complicated, delicate designs can be peeled, applied, and then have the transfer tape removed.
Many bikers wheel decals on their road bikes mainly to change up the appearance. They’re also pretty frequently used to cover up blemishes and damage marks on the wheels.
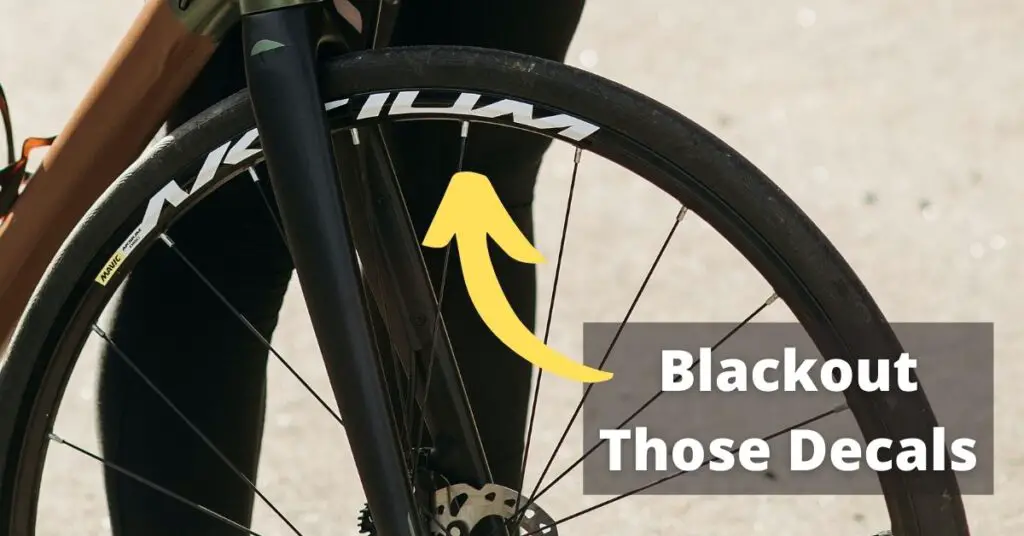
How to Blackout Decals on Road Bike Wheels?
If you are one of those cyclists looking for a minimalist look for your bike, you may want to remove or blackout the decals on your wheels. The decals are either stuck on or etched on with a refined laser spray paint technique.
It’s a good idea to make sure you follow the correct method not to damage your tires.
We have listed methods below!
Method 1- Use a Black Paint Pen to Cover the Lettering
The first technique is to use a black paint pen to cover the lettering on your tire. It does tend to wear off over time, so you will need to repeat the process at some stage.
What you will need:
1- Black Paint Pen – Otherwise known as a permanent laundry marker. You can also buy them in the sewing aisle.
2- A microfibre cloth
Steps:
STEP 1- Clean the tire with the microfibre cloth to remove and dirt.
STEP 2- Carefully paint over the lettering with the black paint pen. It is a better alternative to a permanent marker as it tends to last longer.
Method 2- Use Vinyl Spray Paint to cover the Tire Decals
This technique will give your bike tires a smooth and stealthy look.
What you will need:
1- Masking tape
2- Cleaning fluid
3- Microfibre cloth
4- 220 grit sandpaper
5- Black vinyl upholstery paint (generally used for motor vehicles and can be purchased at an automobile parts store)
Steps:
STEP 1: Give the bicycle tire a thorough wipe to make sure it is clean.
STEP 2: Mask off the decal letters with masking tape so that the paint does not go anywhere else on your tire.
STEP 3: Use the sandpaper to lightly sand the existing decal. This part must be done carefully so as not to damage the sidewall of your tire.
STEP 4: Apply three coats of black upholstery paint over the decal.
It is best to sand the tire lightly, or the paint will not stick to the tire.
Careful!

If you paint directly over the stickers, you will see the outline of the sticker when you are finished, which does not give you a professional finish.

In some cases, the Decals are not stuck onto the carbon, but they are baked on. By spraying over them, they will be prominent and need to be resprayed later.
Method 3- Use 3M’s Single Step Primer
You need to exercise caution when trying out this technique on your tires
The primer, which is usually used to repair windshields and glass on motor vehicles, effectively covers up decals and leaves you with a smooth, black tire surface.
What you will need:
1- 3M Single-step primer, which is available at most automotive shops
2- One pair of surgical gloves
3- One sharp knife
4- Cotton buds
5- Grease remover
6- Microfibre cloth
Steps:
STEP 1- Put on surgical gloves to protect your hands.
STEP 2- Clean the decal on the bike tire with the grease remover and microfibre cloth.
STEP 3- Dip the cotton buds into the 3M single-step primer solution.
STEP 4- Gently paint over the decal until it is completely covered.
STEP 5- Allow to air dry. It is a quick-drying solution, so you won’t have to wait long.
Method 4- Use Bleche-White Whitewall Cleaner
This method is a favorite among cyclists to remove the decals altogether. Why not give it a try?
What you will need:
1- Bleche-White Tire Cleaner used on both black and whitewall tires
2- One pair of surgical gloves
3- Eye protection
4- Microfibre cloth
5- Cleaning fluid
6- Toothbrush
7- Water
Steps:
STEP 1- Put on surgical gloves and eye protection.
STEP 2- Clean the decal on the bike tire with the grease remover and microfibre cloth.
STEP 3- Carefully spray the dry tire with Bleche-White.
STEP 4- Gently scrub with a toothbrush to remove the decal. It is important not to clean too hard, or you will damage the threads on the tire.
STEP 5- Let set for a few minutes.
STEP 6- Use a wet cloth to wipe away any remaining residue.
STEP 7- If the decal is still visible, repeat the process.
STEP 8- Make sure to rinse thoroughly with water.
Method 5- Using a Black Out Decal Set
Your local bike dealer may supply black-out Decal sets which you can place over your Decals. They are made of vinyl and are thick enough to endure weather without cracking, peeling, or discoloration.
Can I Sand and Reclear?

The best way to blackout Decals on carbon wheels involves carefully sanding down the carbon material and reclearing it.

New clear needs to be very thinly applied. It may flake and chip if you try to wedge it into the frame.

It is a good idea to take your bike down to your local bike dealer for a professional finish.
Can I Use black Tire Paint?

Try using black tire paint, which you apply with a foam brush. It is important to note that you will need to apply several coats to get the result you are looking for.

Make sure that it dries completely between coats, or it may wear off.
How Do You Replace Decals on Road Bike Frames & Rims?
It’s time to smarten up your bike with some new decals, but how do you remove the original ones stuck firmly to the frame?
Removing Old Decals
The first step is to make sure the decals can be removed. Some decals are lacquered on and cannot be removed.
Here are our steps to follow to remove the decals easily.
What you will need:
• A set of decals of your choice
• Acetone or cleaning fluid
• Cotton pads or a clean cloth
• Masking tape
• Hairdryer
• Citrus degreaser
Steps:
STEP 1- Make sure your bike frame and wheels are clean and free of dirt and grime.
STEP 2- Use masking tape to mark out where you plan to position your new decal. This will ensure that your decal is straight and even.
STEP 3- Use the hairdryer to heat the existing decal.
STEP 4- Once the decal is heated up, you will be able to pry the corner of the decal. Do not use any sharp objects as this will scratch your frame. You can try using something like a credit card or your nails to lift the decal.
STEP 5- If you find that it is still firmly stuck, use the hair dryer to heat it.
STEP 6- Once you have peeled the decal off your bike, use the citrus degreaser to wipe off any stickiness from the frame or wheels.
STEP 7- Use the acetone to clean off any remaining signs of residue and allow to dry.
Installing New Decals
Have you decided that spending time hunting for your bike during a bike race is no fun?
Decals will give your bike that added personal touch to make it stand out from the crowd so you can easily spot it. Follow these steps for easy application:
What you will need:
• A set of Decals of your choice. They usually come in three layers: the backing paper, the sticker in the middle, followed by a covered by a plastic sheet on the top.
• Scissors
• Cotton pads or a clean cloth
• Masking tape
Steps:
STEP 1- Clean the surface of your bike wheel or stem with the cleaning fluid to make sure it is free of dirt and grime.
We suggest a microfibre cloth as it doesn’t leave any lint behind. A good clean is essential, or the sticker will not hold.
STEP 2- The most challenging part of the process is positioning the decal. Use the masking tape to mask off the area where you want to apply the decal.
STEP 3- The decal is usually positioned in the middle of the backing paper, so you might need to trim off excess backing so that you are left with only the sticker. Try and cut as close to the decal as possible. Your decal must fit into the masked area.
STEP 4- Gently remove the backing paper so that you don’t disturb the graphic. The graphic will be stuck to the protective plastic sheet. Don’t touch the actual graphic, or you will end up with a fingerprint on your decal.
STEP 5- You might find that larger stickers are hard to line up, so take your time. Line the sticker up with the masking tape.
STEP 6- Once in position, use your fingers to apply pressure across the length of the decal.
STEP 7- Rub the decal down with your fingers so that any bubbles are removed. Run from the centre to the outside of the decal. Make sure any crinkles or bubbles are completely removed from under the decal using your thumbnail or a credit card.
STEP 8- Leave the decal for 5 to 10 minutes to make sure it is adequately stuck.
STEP 9- The next step is to peel off the plastic sheet covering the decal. The trick is to pull the protective sheet off from the corner. Make sure you do this slowly and carefully, or you will damage the decal.
STEP 10- Slowly drag it back, leaving the decal behind and nicely stuck to your bike.
STEP 11- Remove the masking tape which you had initially placed on the bike.
If you followed all the steps correctly, you should have a bike with unique decals firmly placed on your wheels or frame.
Final Thoughts!
We all want to have the bike of our dreams, and if it means removing those unsightly logos and Decals, don’t be afraid to try any of the methods suggested above.
Be sure to exercise caution and follow the safety guidelines when using harmful chemicals. Whether installing, removing, or blacking out your Decals your bike will soon look and feel brand new!
Cheers!